

Handle transitions between approaches#
Data organized with one approach can move to another as your testing changes, and the data you’ve already recorded stays where it is. This page covers moving from the tagged approach, where one dataset holds many units’ data tagged by unit, toward assets and datasets for each unit. Use it when moving from test station development to repeatable test execution, or whenever the units on a shared dataset need histories of their own.
Giving each unit an asset#
Once you test units the same way again and again, give each unit under test an asset of its own that filters the shared dataset by the unit’s tag. Then mark each test with a run on the unit’s asset, as in the walkthrough below. In this example, the shared dataset is a test station’s, tagged by board.
        ---
config:
  layout: elk

---
flowchart BT
    classDef green fill:#dcfce7,stroke:#15803d,color:#1f2937
    classDef red fill:#fee2e2,stroke:#b91c1c,color:#1f2937
    classDef purple fill:#e0e7ff,stroke:#4338ca,color:#1f2937
    classDef darkgreen fill:#bbf7d0,stroke:#15803d,color:#1f2937

    subgraph dataset1["Dataset: Test station"]
        raw["<u>Monday</u><br>board=A<br>09:00:00 · 12.1<br>...<br><br><u>Tuesday</u><br>board=B<br>10:30:00 · 11.8<br>..."]:::purple
    end
    style dataset1 fill:#f5f7ff,stroke:#4338ca,color:#1f2937

    station["Asset: Test station"]:::darkgreen
    dataset1 -->|"ref name=default"| station
    assetA["Asset: Board A"]:::green
    dataset1 -->|"ref name=default<br>filter board=A"| assetA
    assetB["Asset: Board B"]:::green
    dataset1 -->|"ref name=default<br>filter board=B"| assetB

    runA["Run: Test 1<br>on Board A"]:::red
    assetA --> runA
    runB["Run: Test 1<br>on Board B"]:::red
    assetB --> runB

    click station,assetA,assetB href "../../../#asset" "Asset"
    click dataset1 href "../../../#time-series-data" "Time-series data"
    click runA,runB href "../../../#runs" "Runs"
The station’s own asset is still linked to every point the station has recorded, so you can keep monitoring the station’s health.
Walkthrough: add an asset for each unit#
When you’re ready to track each unit on its own:
In the sidebar, click Assets, then NEW ASSET, and name the asset after the unit.
Under Data sources, click ADD DATA SOURCE and pick the shared dataset.
Set the Refname to
default, click ADD TAG FILTERS, and choose the tag, then the unit’s value, for exampleboard=A.Click SAVE TO ASSET, then CREATE ASSET.
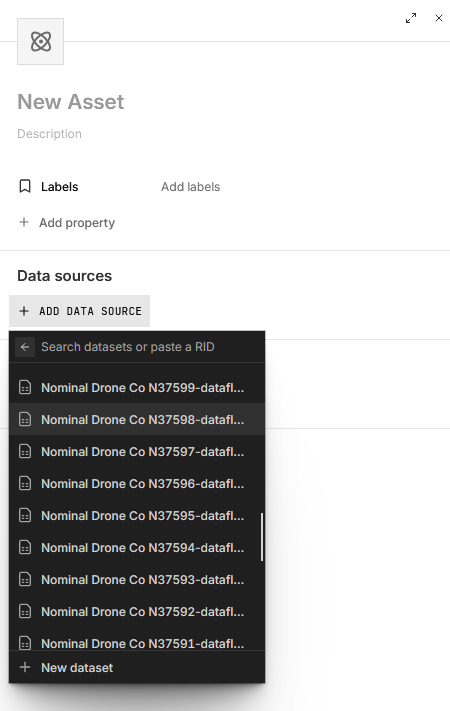
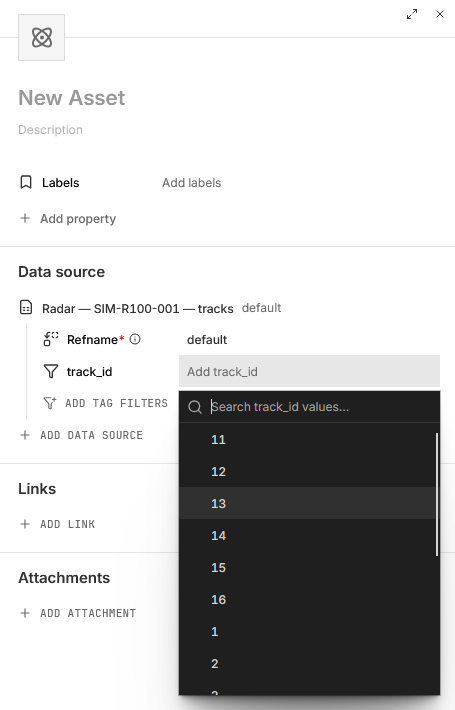
In code, the tagged approach shows the same setup in Python, Rust, MATLAB, and Go.
Then record each test as a run on the unit’s asset:
On the asset’s page, click the arrow beside NEW WORKBOOK in the top right and choose New run. You can also create a run by selecting the Runs tab and pressing NEW RUN.
Give the run a title, and set its Start to when the test began. Leave End empty while the test is running. If the test is already over, set End too, or, if the asset’s files cover the test, click Add files under Determine bounds with files and pick the files to set both from them.
Add labels and properties for the test, such as the procedure or its revision, and click CREATE RUN.
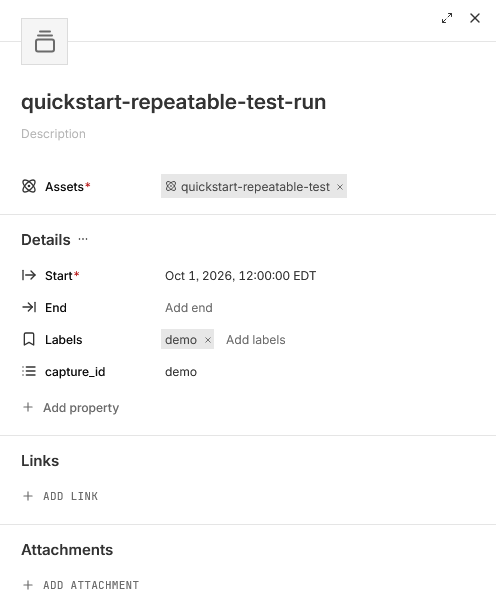
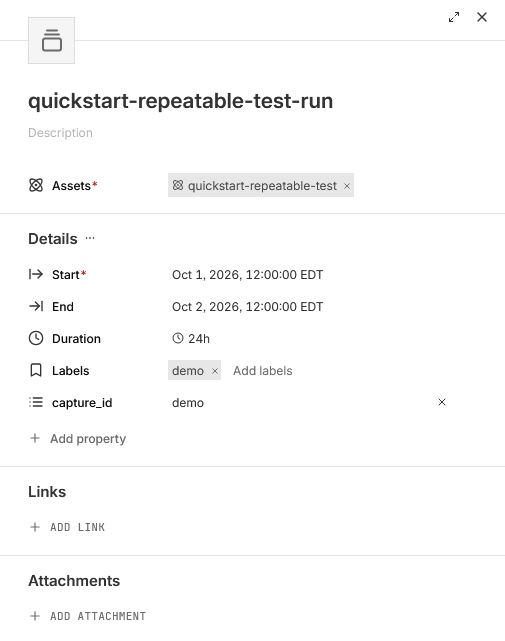
If you left End empty, set it under Details on the run’s page once the test is over and its data is in.
Giving each unit a dataset of its own#
Per-unit assets on the shared dataset, as above, already give each unit its own runs and history. If the units become long-lived, tested across many campaigns, or have untagged data unique to the unit, give each unit a dataset of its own as well. This combines the default and tagged approaches. The shared source keeps writing to its tagged dataset, and each unit’s dataset holds what belongs to the unit, such as an onboard computer’s internal readings in a hardware-in-the-loop test, or its tests on other stations.
Attach the unit’s dataset to its asset under a ref name of its own, such as unit. The shared dataset keeps the ref name default, so the workbooks you already have keep working. The shared source’s own asset still sees every point the source records, so monitoring it, such as monitoring a test station, is unchanged.
What decides whether a unit needs a dataset of its own is where its data comes from, not how many stations it passes through. If every measurement comes from test stations that tag it with the unit, one tagged dataset is enough, even across stations. The tagged approach’s multi-tester extension keeps one dataset for the whole production line and tags each point with both its unit and its tester. If a file or stream comes from the unit itself rather than the shared source, give the unit its own dataset.
        ---
config:
  layout: elk

---
flowchart BT
    classDef green fill:#dcfce7,stroke:#15803d,color:#1f2937
    classDef purple fill:#e0e7ff,stroke:#4338ca,color:#1f2937
    classDef darkgreen fill:#bbf7d0,stroke:#15803d,color:#1f2937

    stationData[("Dataset<br>Test station<br><br>Tagged by board")]:::purple
    station["Asset: Test station"]:::darkgreen
    stationData -->|"ref name=default<br>no filter"| station

    assetC["Asset: Board C"]:::green
    stationData -->|"ref name=default<br>filter board=C"| assetC
    datasetC[("Dataset<br>Board C")]:::purple
    datasetC -->|"ref name=unit"| assetC

    assetD["Asset: Board D"]:::green
    stationData -->|"ref name=default<br>filter board=D"| assetD
    datasetD[("Dataset<br>Board D")]:::purple
    datasetD -->|"ref name=unit"| assetD

    click station,assetC,assetD href "../../../#asset" "Asset"
    click stationData,datasetC,datasetD href "../../../#time-series-data" "Time-series data"
Walkthrough: give each unit its own dataset#
Upload data unique to a specific unit:
In the sidebar, click + (New), then Upload data, and add the unit’s files.
Click SELECT A DESTINATION, choose Link to an existing asset, and pick the unit.
In Organize your data:
The first time, click ADD DATA, then New dataset, and name it after the unit. The sheet warns that the asset already has a dataset, but this one holds the unit’s own channels, so click CREATE DATASET. Under Refname, type
unitand click Create “unit”.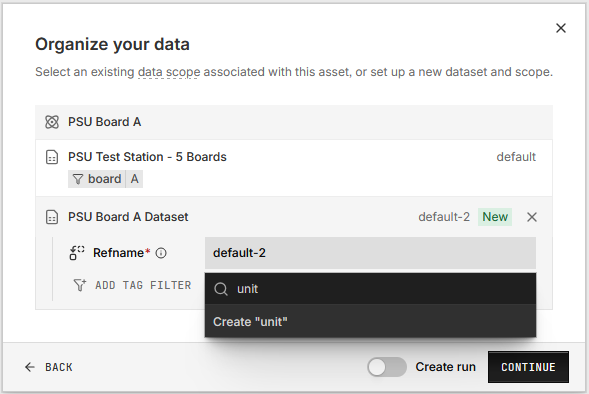
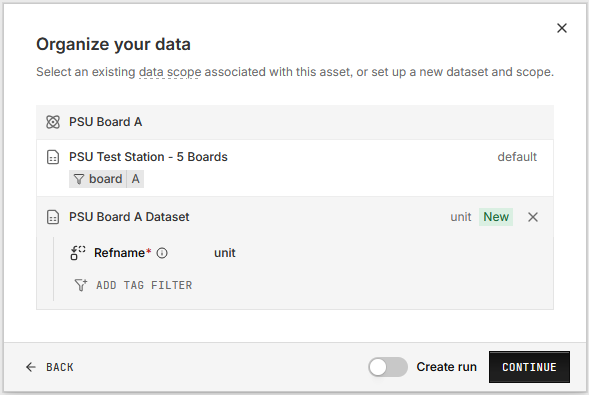
After that, click the unit’s existing
unitdata scope.
Click CONTINUE and check the timestamp in the Settings panel. Turn on Create run, name the run, and click CREATE RUN, then click CONFIRM & INGEST.
In Python:
from nominal.core import NominalClient

client = NominalClient.from_profile("default")
unit = client.get_asset("<ri.scout.instance.asset.identifier>")  # the unit's asset

dataset = unit.get_or_create_dataset("unit", name="Board C")  # the unit's own data, under the ref name unit